
Patients searching for spine surgery in Florida are often weighing several concerns at the same time. They want relief from ongoing pain, but they also want to understand recovery, procedure options, and whether surgery can…
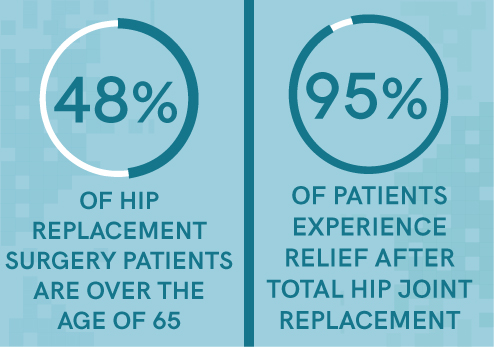
Hip joint replacement surgery has become much more common in the past decade. This is due in large part to advances in surgical methods and implant equipment that have increased the longevity of replacement joints and the odds of a successful surgery. As a result, thousands of patients, 48 percent of whom are over the age of 65, undergo hip replacement surgery each year in the United States.
Most patients opt for hip replacement surgery to get relief from the pain and stiffness caused by arthritis, injuries or other bone problems. The American Academy of Orthopaedic Surgeons reports that 95 percent of patients who undergo total hip joint replacement experience relief of the hip pain that prompted them to have the surgery. Along with pain relief and greater mobility, hip replacement surgery also yields other positive results. Most patients who undergo hip replacement see a noticeable difference in their activity level and quality of life after having the procedure.
The success of your hip replacement surgery depends on several factors, including your overall health and adherence to your rehabilitation regimen. Being an active rehab patient is essential for having the best chance of positive results. Most hip surgery patients see a physical therapist, but doing exercises at home is also essential for a full recovery. There are many post-hip surgery exercises that you can do at home without any special equipment or assistance.
Exercise after surgery helps improve your joint flexibility and strength and increase your range of motion. Post-hip surgery exercises are broken down into different phases, starting from the day of or the day after surgery to around 4-6 months later. As your recovery progresses, so should the frequency and intensity of the exercise. Proper post-hip surgery care and exercise can help speed up your recovery time and get you back to your normal activity level and routine as soon as possible.
Phase 1 Exercises
All post surgery exercises must be performed under the direction of your physical therapist. Be careful not to overdo it and avoid activities that could cause muscle and tissue damage, hip dislocation or a serious fall. While your goal should be to increase your activity level every day, you need to do so safely.
You can expect to begin rehab exercises soon after your surgery. Early post surgery exercises, often referred to as Phase 1, are usually done while lying in bed or in a seated position with the goal of preventing dangerous blood clots. You should do these exercises several times a day on both legs. Repeat each exercise 5-10 times at first, working up to more as you get stronger. You can even do these exercises before surgery to help get you ready and continue them throughout the other stages of your recovery.
Phase 1 Exercises include:
- Ankle pumps and circles – Pull your toes up toward you and move your ankles backward and forward, being careful not to overextend. Then, point your toes toward the ceiling and rotate your ankles clockwise and counterclockwise. Do these as often as possible immediately following surgery to keep blood circulating and prevent dangerous blood clots from forming.
- Heel slides – While lying in bed, bend one leg at a time and slide your heel back toward your buttocks without lifting it off the bed. Your kneecap should face the ceiling the whole time. Try sliding a plastic bag under your foot for easier movement. Be sure to consult your surgeon or physical therapist about how far you can bend your hip.
- Thigh and buttock squeezes – Without moving your legs, tighten the thigh muscles and push the back of your knee down onto the bed. Squeeze for about 5 seconds and release. Move up to your buttock muscles and squeeze them together for 5 seconds, then release.
- Straight leg raises – While lying down with your legs straight out in front of you, raise one leg a few inches without bending your knee. Hold for 5-10 seconds and slowly lower it back down. Check with your physical therapist to see if this exercise is recommended in the early phases of your recovery.
- Leg slides – While lying down, slide your leg slowly out to the side and then back. Keep your knee pointed toward the ceiling and use a plastic bag under your heel if necessary to make it slide easier. Check with your physical therapist to see whether this is safe to do on your own.
Your doctor may encourage you to stand and walk soon after your surgery. Your muscles will probably feel weak and your hip stiff due to the lack of motion, but most hip surgery patients are allowed to bear as much weight on their operated leg as they can tolerate. Take short, frequent walks every day to strengthen your leg and increase joint mobility. You may need to use a walker or crutches at first, but as your leg strength increases, you can progress to a single crutch or cane. Once your balance is back to normal, you can walk unassisted.
Phase 2 Exercises
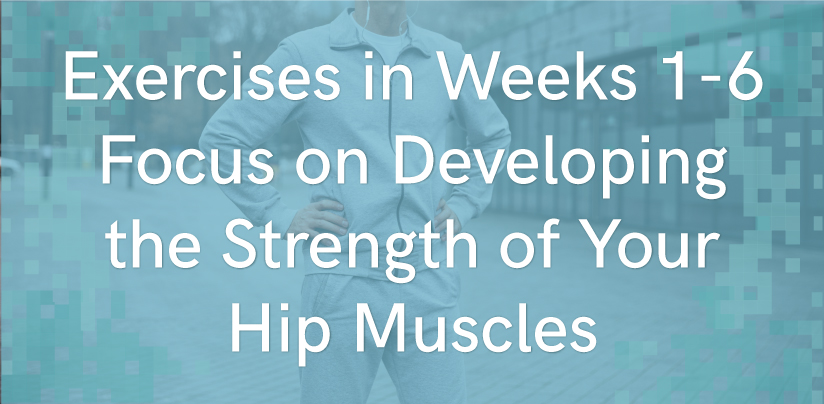
Phase 2 exercises are incorporated into your rehab routine one to six weeks after surgery. These exercises focus on developing the strength of your hip muscles. Some of them involve moving your leg sideways and backward to develop strength, while others are standing exercises that help improve your balance. Your doctor may also recommend step-up exercises and walking on uneven surfaces. Hold on to a wall or other sturdy surface when doing these types of activities to avoid losing your balance and falling.
Phase 2 exercises include:
- Standing knee raises – Lift your knee up toward your chest, bringing it no higher than your waist. Hold for a few seconds, then lower your leg down slowly.
- Standing hip abduction – With a straight body and your hip, knee and foot pointing forward, lift your leg slowly out to the side and lower back to the floor slowly. Be sure to keep your knee straight.
- Standing hip extensions – While standing and keeping your back straight, move your leg in a backward motion. Hold for a few seconds and lower your leg back down.
- Step-ups – Place a sturdy 2-4-inch object (like a book) on the floor to use as a step. While holding onto something for support, step up onto the object. Slowly step back down.
- Sideways step-ups – Using the same 2-4-inch sturdy object, step up sideways. Slowly step back down.
- Exercycling – Using an exercise bike, begin pedaling backward at first until you’re comfortable with the pedaling motion. Then, pedal forward. Later in this phase, you can slowly increase resistance as you gain strength and endurance. Start off with 10-15 minutes and work up to 20-30 minutes a few times a week.
During this phase, your doctor may also encourage you to climb stairs. This is a great activity for strengthening your legs and building endurance. Be sure to use a handrail as your balance returns to normal, along with a crutch or cane if you need it. When climbing stairs during this phase, climb one step at a time and avoid steps over 7 inches high. It can also help to climb up the stairs with your “good” leg and descend down the stairs with your operated leg.
Phase 3 Exercises
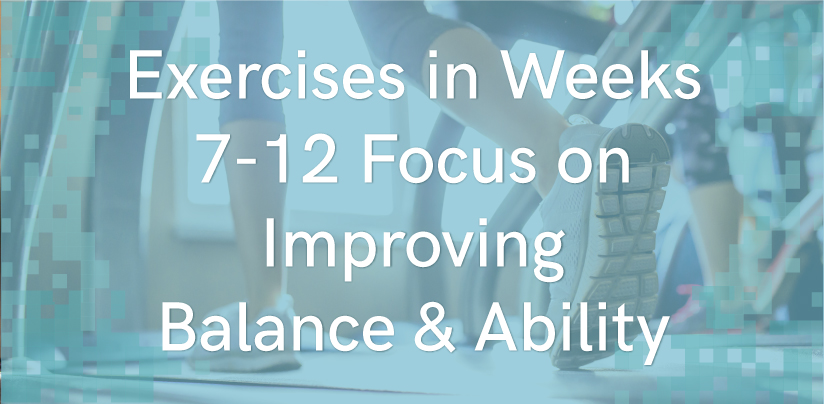
Phase 3, which typically takes place seven to 12 weeks post-surgery, involves continuing the same exercises from the previous phases and adding a few higher-intensity activities. You can add ankle weights, resistance bands, elastic loops or rubber tubing to increase hip strength. You will also do exercises that focus on improving balance and walking speed and ability, like walking on a treadmill or in a pool.
You should do resistance exercises in sets of 10, about four times a day. While standing, place one end of a resistance band or elastic loop around the ankle of your operated leg and the other around a heavy secure object like a table leg or other piece of furniture. Hold onto a chair or steady object for support.
- Resistive hip flexion – Stand with your feet slightly apart and your operated knee straight. Slowly bring your leg forward and then back down.
- Resistive hip abduction – Stand sideways next to the piece of furniture to which the band is secured. The band will be in front of your “good” leg. Slowly lift your leg out to the side, then lower it back down.
- Resistive hip extensions – Stand facing the piece of furniture to which your leg band is secured and slowly pull your leg straight back, then place it back down.
During this phase, your doctor may lift some of the restrictions from earlier phases. The goal at this point is to increase your balance and flexibility until they are back to a normal level. While you may require support for these exercises at the beginning of this phase, you should progress to doing them unsupported by the end.
Phase 4 Exercises
Weeks 12-16 encompass the final phase of hip replacement surgery recovery. Although you must still be careful with your new hip, most people resume their normal activities during this time. Formal rehab is often finished after six months, but don’t be discouraged if you still feel some aches and pains with strenuous exercise or activities after that point. Continue to consult with your doctor to make sure that your recovery is going smoothly. They may recommend other exercises that you can perform at home to ensure continued joint mobility and strength.
Activities that you may do during this phase include:
- Light hiking
- Light lifting, pulling and squatting
- Bicycling (as long as your hip does not bend past 90 degrees)
- Swimming
- Golfing
- Low impact dancing
- Gardening (while using long-handled tools to avoid overextending your hip)
You may also do higher-impact activities like horseback riding, water sports and skiing with your doctor’s approval. Keep in mind, however, that there are higher fall and injury risks associated with these types of activities. Engaging in them after hip surgery isn’t recommended unless you did them at a high skill level before surgery. You don’t want to risk falling and dislocating your new hip joint or breaking the bone around your prosthesis.
Hip Surgery Recovery Tips
- Your hip may be warm and swollen for many weeks after your surgery. However, this shouldn’t deter you from exercising. Put an ice pack on the swollen areas of your leg after you do your exercises. Place a thin towel between cold packs and your skin and keep them on for 20 minutes at a time.
- Swelling is made worse by sitting for long periods, so most doctors recommend that you don’t sit for more than 30 minutes at a time.
- Notify your doctor immediately if you notice increasing calf pain, swelling in your feet, calves or ankles, or redness or tenderness near the knee. These can be signs of life-threatening blood clots, as can sudden shortness of breath and chest pain.
- During your recovery phase, avoid movements that involve rotating your hip inward or outward or require you to bring your knees to your chest. These types of positions can cause your new hip joint to dislocate.
Advances in prostheses have significantly reduced the incidence of revision surgery, but it is still a possibility. - During your early recovery phases, avoid running, lifting or pushing heavy objects (over 25 lbs.), high- impact activities and contact sports. You should also avoid any activities that involve sudden twisting or jumping or put excessive force on your new joint.

Considering Hip Replacement Surgery?
The decision to undergo hip replacement surgery is not one to be taken lightly. However, for most patients, the relief from the hip pain and discomfort is well worth the relatively quick postoperative recovery period.
Most patients experiencing hip pain have many questions about treatment options, surgical procedures and recovery time. If you’re experiencing hip issues and are ready to learn more about our minimally invasive hip replacement surgery, contact us to schedule a confidential consultation with one of our orthopedic doctors today.